✓ Royal Mail Authorised Inspector since 2008 | Trading since 2005


SendPro Mailstation & Mailsend Lite Installation Support
SendPro Mailstation & Mailsend Lite · Installation
How to install the SendPro Mailstation and Mailsend Lite franking machine – set up your account, connect to the internet, install the ink cartridge and scale, run a test print and add postage.
Download the SendPro Mailstation & Mailsend Lite installation instructions (PDF) – or follow the step-by-step guide below.
What do I need before installing my Mailsend Lite?
Before you start, set up your Online Shipping Account and decide how you will connect to the internet.
- Online Shipping Account: you need your 8-digit account number and the serial number (Mailcoms can provide these). You will enter an email address and password during setup. Visit pitneybowes.co.uk/signin and click Sign up to create your account.
- Wired connection: takes about 10 minutes; needs a network port and power outlet.
- Wireless connection: takes about 15 minutes; needs a wireless router, its network name and password, and a power outlet.
How do I unpack and power on the Mailsend Lite?
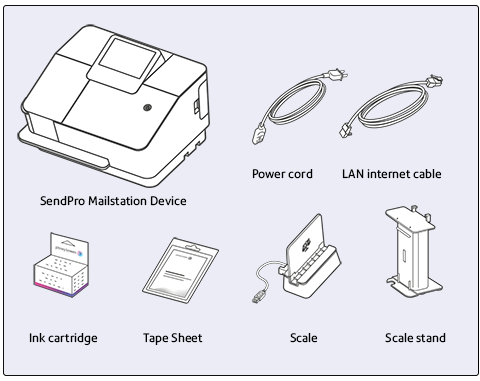
Check the box contents against the diagram – if anything is missing, contact Mailcoms.
- Remove all tape.
- Open the cover and remove the orange protector, then close the cover.
- Connect the device to a wall power outlet and press the power button, then wait for it to start up.
- Tap Get Started on the touchscreen to continue.
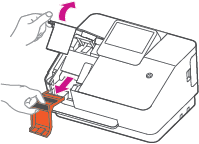
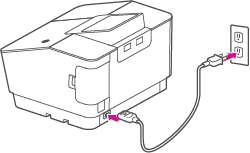
Warning: Do not install the ink yet – you get the “Install ink cartridge” prompt later in the process.
How do I connect the Mailsend Lite to the internet during setup?
- Tap your network type, Wired or Wireless.
- For Wireless: tap your router name, enter the password and tap Connect.
- For Wired: plug the Ethernet cable into the back of the device, tap Advanced Network Options, then tap Connect.
- Tap Continue when you see Connected to Network.
Follow the prompts to select your language, log into your account and complete the online installation. You are then prompted to install the ink and scale.
How do I install the ink cartridge and run a test print?
- Remove the new ink cartridge from its container and remove the orange sticker from the bottom.
- Open the ink door.
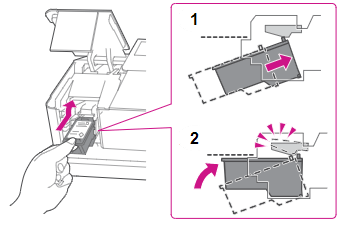
- Slide the cartridge in at an upward angle, then firmly press it up until it clicks into place.
- Close the ink door and tap Continue.
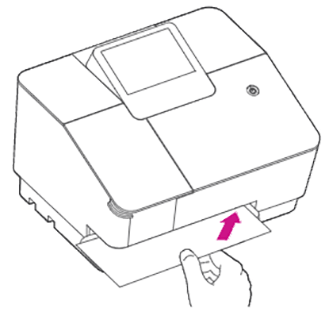
- When the screen says Create a Test Print, insert an envelope or tape sheet into the slot, pushing all the way to the back and right – the device clamps it and prints.
- Compare the test print to the on-screen samples and tap Good Test Print, then Continue.
How do I install the scale on the Mailsend Lite?
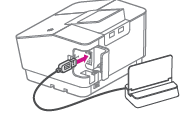
- Open the door on the right side of the device to access the USB port.
- Connect the USB cable to the device.
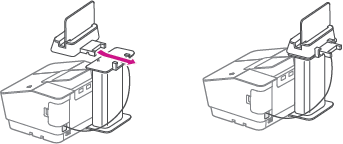
- Position the scale – either on the stand behind the device (slide the stand under the left back side and slide the scale onto the pegs), or on either side of the device, following the on-screen prompts.
How do I add postage to finish setting up the Mailsend Lite?
- Tap Continue.
- Enter an amount.
- Tap Add Postage.
Your Mailsend Lite is now ready for use.
Mailsend Lite Installation – Frequently Asked Questions
What do I need to install a Mailsend Lite?
Your Online Shipping Account (8-digit account number and serial number) and a wired or wireless internet connection with a power outlet.
When do I install the ink in a Mailsend Lite?
Not at unpacking. The device prompts you to install the ink cartridge later, after the online setup steps.
How long does Mailsend Lite installation take?
About 10 minutes for a wired connection or 15 minutes for wireless, including the online setup.
Still having trouble installing your Mailsend Lite?
Our technical team are Royal Mail Authorised Inspectors and fully qualified franking machine engineers. Call us on 01543 572 776 – Mon–Fri 9:00 to 17:00.