The franking machines occasionally show different error codes. Some error codes tend to be due to connection issues and can all be resolved easily. Below you will be able to find out what the error codes are and how to potentially resolve the issue. See if we can help you below.
Error Code 1811
Error Code 1814
Error Code 1815
Error Code 1816
Error Code 1825
Error Code 1822
Error Code 1826
Error Code 1829
Error Code 1870
Error Code 51
Error Code 23
Error Code 200D
Issue
The franking machine displays one of the following error codes or system messages, and will not connect to the Data Centre:
Error codes on franking machine: 1811, 1814, 1815, 1816, 1825, 1822, 1826, 1829, 1870, 51, 23, 200D, and DE00
Messages:
- Error Unable To Resolve Host,
- Unable To Resolve api.pitneybowes.com
- Failed to Update Please Contact Pitney Bowes
- PB Commerce Cloud Not Found
- Unable to complete refill – MessageID: PerformAuditRsp – Status: Not Connected to Internet
- Sync your data
- The data centre sent back a PVD error record when the UIC was expecting a PVD response.
- The data centre has found an exception and returned the GenRsp message. At this point the PBP task is in control of the dialogue.
Cause
The franking machine is not connecting to the server.
Resolution
1. Tap the Settings (gear) icon and tap Sync Transaction data.
2. You may be able to clear the error by simply restarting your franking machine. Here are the steps to follow for a safe restart:
a. Unplug the power cable.
b. Wait for the display to turn off.
c. Wait one minute.
d. Plug the power cable back in, ensuring that it is plugged directly into a wall outlet.
e. If you need further assistance, please use the Contact Us options below. Please have your model and serial number ready.
3. If the connection still does not work, follow the connection troubleshooting steps for your connection method:
– If you have a network cable that runs from the back of your franking machine to a wall jack, switch, or router, your franking machine connects via a wired connection.
– If there is no network cable, your franking machine connects via a wireless (Wi-Fi) connection.
The franking machines occasionally show different error codes. One error code that might show is error code BA00 or BA05. Below you will be able to find out what the error code is and how to potentially resolve the issue.
Issue
Error code BA00 or BA05 appears.
Cause
The franking machine base is disconnected from the tablet.
Resolution
Reboot the device:
1. Unplug the Ethernet cable if you are using a wired connection. If you are using a Wi-Fi connection:
1. Tap Tap the Settings (gear) icon in the global toolbar.
2. Tap Wi-Fi.
3. Move the slider for Wi-Fi all the way to the Off position.
2. Unplug the power cable.
3. Wait five (5) minutes. The screen should turn off after 10 seconds. If the tablet does not power off when you unplug the power cable, try one of the following options:
1. Plug the power cable back in, reboot the unit. Try the sequence again. If successful, go to step 4.
2. Plug the power cable back in and reboot the device. Shut it down by holding the power button to see if the shutdown sequence works properly. If successful, go to step 4.
3. Leave the power unplugged overnight and let the tablet battery die. Plug the device in the next day, wait 1-2 hours before turning back on. If successful go to step 6.
4. Once you have successfully powered down the tablet, plug the power cable back in, making sure that it is plugged directly into a wall outlet.
5. Quickly tap and release the power button to turn device back on.
6. Tap on Envelope Printing.
Note: The print carriage inside the machine should make a grinding or purring noise during reboot. If the machine makes no noise during reboot please contact us on 01543 572 776.
Note: If the power light is flashing after a successful reboot and issue persists, please contact us on 01543 572 776.
7. If BA00 or BA05 still appears after opening Envelope Printing, contact customer support. Use the Contact Us options below.
8. If BA00 or BA05 no longer happens, reconnect the Ethernet cable or turn Wi-Fi back on.
The franking machines occasionally show different error codes. Some error codes appears and the franking machine will not print. Below you will be able to find out what the error codes are and how to potentially resolve the issue. See if we can help you below.
Issue
Error code RA00, DL00 or DL01 appears and the franking machine will not print.
Cause
The franking machine base is not able to initialize the rates manager, or the franking machine is not on the account.
Resolution
1. Tap Envelope Printing.
2. Tap Postage Balance.
3. Wait for Last Update: Just Now to appear.
4. Unplug the franking machine power cable for 10 seconds.
5. Plug the power cable back in, ensuring that it is plugged directly into a wall outlet.
6. Quickly tap and release the power button.
7. Tap the double-headed arrow on the right side of the application drawer at the bottom of the Home screen. This expands the application drawer.
8. Tap the Rates & Update button.
If you need further assistance, please contact us on 01543 572 776.
Issue
The device displays error code 18FF.
Cause
Some transactions failed to synchronize.
Resolution
Step 1: Restart your device
You may be able to clear the error by restarting your device. Follow these steps to perform a safe restart.
1. Unplug the power cord. The screen turns off after 10 seconds.
2. Wait 30 seconds.
3. Plug the power cord directly back into a wall outlet. Check that the wall outlet is working correctly.
4. Quickly tap and release the power button to turn the device back on.
Once the device has fully restarted, go to Step 2.
Step 2: Sync transactions
1. Tap the Settings (gear) icon in the global toolbar.
2. Scroll down to the Envelope Printer Settings section.
3. Tap Sync Transaction Data. A series of messages appear on the screen, starting with Preparing Transaction Data followed by Sending Transaction Data.
4. Once you upload the transactions, the message Transaction Data Sent appears. If there are no more transactions to upload, the message No Sync Required appears.
Depending on the number of transactions you need to upload you may have to sync transactions multiple times. If you have to sync more than 3 times, please contact us on 01543 572 776.
Watch this video to learn how to frank a letter with your franking machine.
To frank a letter, please follow the below instructions:
1. To get started press into “envelope printing”.
2. Select the class box on the right-hand side.
3. Press “Start over”.
4. Select which service you require from the list.
5. If using “First” or “Second” class mail, select the size using you Mailcoms PIP ruler or if you required RM signed for select this first.
6. Once you have selected your service and size click “apply”.
7. Place your item on the scale to confirm the correct price is being shown.
8. If all is correct, the machine will display ready to print.
9. Feed your envelope or label through the machine as shown.
10. If you have printed on a label, affix to your item and it is ready to be sent.
Watch this video to learn how to check for updates / update your postage rates with your franking machine.
To check for updates / update your postage rates, please follow the below instructions:
1. From the home screen press “Sendpro apps”.
2. Press the option for “Rates & Updates”.
3. The machine will now connect to check for updates and any available files will be downloaded.
Watch this video to learn how to process International items with your franking machine.
To process International items, please follow the below instructions:
1. From the Home Screen, Select the “Envelope Printing” option.
2. Select the class box on the right-hand side.
3. Press “Start over”.
4. Select “International” from the list.
5. Choose the service you require from the list. Please Note: All countries offer different services. If the country does not appear in the option selected, try another service.
6.Select the size of your item, using your Mailcoms PIP ruler.
7. Enter the destination of your item using the keyboard on screen.
8. As stated above if the country does not appear when typing in, go back and select a different service.
9. Once you have selected the destination country, the machine will ask if you would like additional compensation. IF you require this tick the box.
10. Press “Apply”.
11. Place your item on the scale to confirm the correct price is being shown.
12. If all is correct, the machine will display ready to print.
13. Feed your envelope or label through the machine as shown.
14. If you have printed on a label, affix to your item and it is ready to be sent.
Watch this video to learn how to process a surcharge payment on your franking machine.
1. From the home screen select “Envelope Printing”
2. Select the class box on the right-hand side.
3. Press “Start over”.
4. Scroll to the and select the bottom option “Surcharge payment”.
5. Select the “Surcharge payment” option again.
6. Choose the option between “0.01 – 500.00”.
7. Using the keypad type in your required amount.
8. Click “Apply”.
9. Click “Apply” again at the bottom.
10. Clear the High value postage message by clicking the cross in the corner of the box.
11. Feed your item through the machine to produce the print.
Issue
The franking machine displays the message “Shared Services has stopped working” and will not print.
Cause
The franking machine software has encountered an error.
Resolution
You may be able to clear the error by restarting the franking machine:
1. Unplug the power cord.
2. Wait for the display to turn off.
3. Wait one minute.
4. Turn the power back on.
If you need further assistance, please contact us on 01543 572 776.
This procedure describes how to seal envelopes whether you are printing postage on the envelopes or only sealing the envelopes (no-postage). If you are only sealing envelopes, refer to Sealing the envelope only – (bypass all printing) below.
1. Check the level of sealant in the moistener tank and add more if required. Refer to Filling the moistener tank below for detailed steps.
2. When feeding an envelope be sure to slide the envelope flap under the edge of the feed deck, so the moistener can wet the flap.
Note: If the moistener tank is full and your envelopes are still not sealing correctly, clean or replace the moistener brush and wick. Refer to Cleaning the moistener brush and wick assembly below for detailed steps.
Refer to Sealing envelopes above for the correct way of feeding envelopes to ensure they are sealed properly.
1. Tap Envelope Printing on the Home screen.
2. Tap Print Mode on the lower left side of the Envelope Printing screen. You may have to swipe up on the screen to see this option.
3. Select Seal Only.
4. Tap Apply.
5. Place the first envelope face up, flap down into the feeder. Be sure to slide the envelope flap under the edge of the feed deck.
Sealing issues can be caused by:
– not enough sealant in the moistener tank
– not placing the envelope correctly on the feed deck
– problems with the moistener brush or wick
Use this checklist to avoid envelope sealing issues:
– Check the level of sealant in the moistener tank and add more if required.
– When feeding an envelope be sure to slide the envelope flap under the edge of the feed deck. Otherwise, the moistener cannot wet the flap.
– If the moistener tank is full, and your envelopes are still not sealing correctly, clean or replace your moistener brush and wick.
Issue
The franking machine is not sealing or only partially sealing envelopes.
Cause
Sealing issues are usually caused by inadequate sealant in the moistener tank, or problems with the wick or brush in the moistener.
Resolution
1. Be sure to slide the envelope flap under the edge of the feed deck. Otherwise, the moistener cannot wet the flap.
2. Check the sealant level by looking at the sight glass on the left side of the moistener tank.
- If the sealant level is low, add sealing solution until it reaches the bottom of the fill hole. Do not overfill the moistener tank.
- If the tank was empty, allow 30 minutes for the moistener brush and wick to get completely wet before trying to use the moistener.
3. Check if the moistener brush is dry. If it is:
- Make sure that the white thumbscrews on the bottom of the sealer are tight.
- Try wetting the moistener brush manually.
- Make sure that the brush is making contact with the wick. You may need to lift the wick up slightly to make sure that it is making contact with the brush.
Note: If the brush dries out quickly, replace the moistener wick.
4. Check if the moistener brush is dirty. If it is, remove the moistener brush, clean it in plain water, and rinse thoroughly.
If you need further assistance, please contact us on 01543 572 776.
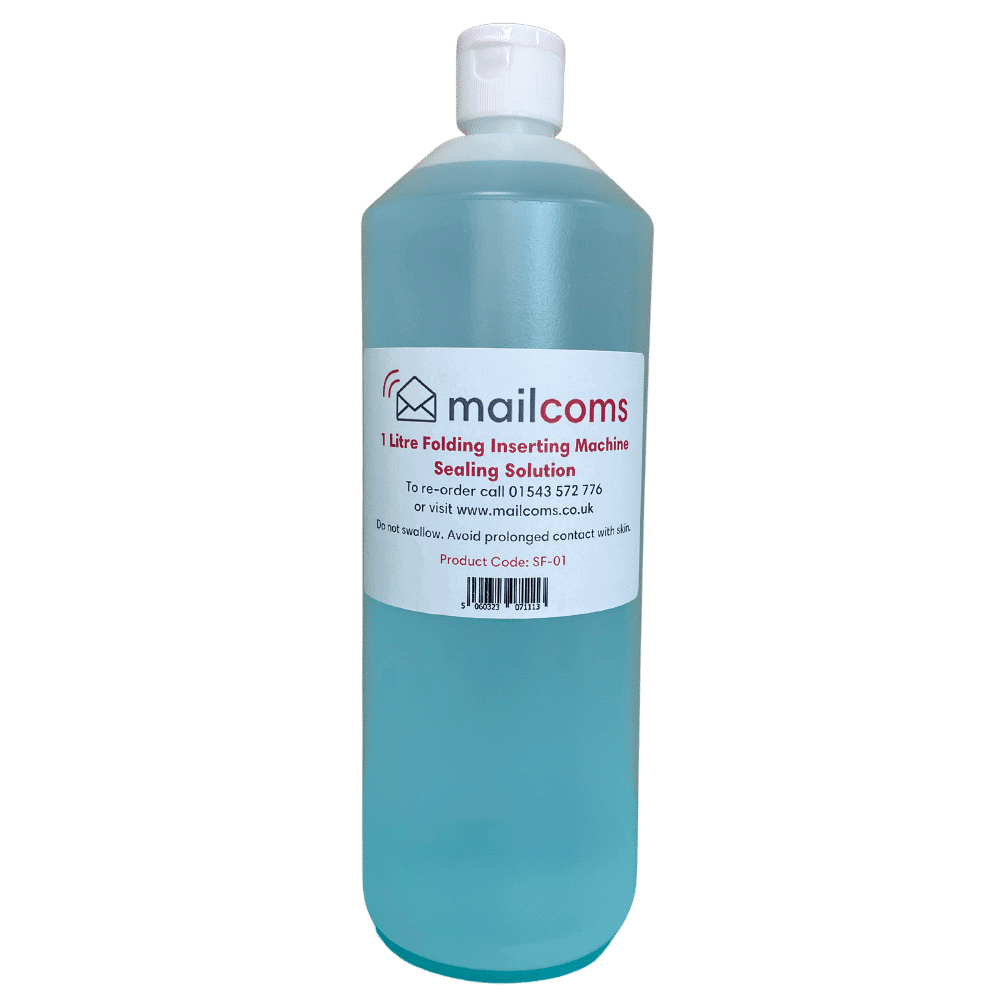
Your franking machine will periodically need refills of Sealing Solution in order to seal envelopes. Follow these steps to fill the moistener tank.
1. Check the level of sealing solution in the moistener tank.

2. Add enough E-Z Seal® Sealing Solution to bring the sealant level up to the bottom of the fill hole. Do not overfill the tank.
3. If the tank is empty, allow 30 minutes for the moistener brush and wick to get completely saturated.
If you need further assistance, please contact us on 01543 572 776.
If the moistener tank is full and your envelopes are not being sealed properly, clean the moistener brush and wick.
1. Unscrew the plastic thumbscrew under the moistener base.

2. Lift the moistener brush assembly off the top of the moistener base.

3. Turn the assembly over and slide the moistener brush out of the holder.

4. Locate the wick (with metal grate) on moistener base.

5. Remove the metal grate and wick from the moistener base.

6. Clean the brush and wick with water and rinse thoroughly.
7. Place the wick back in the metal grate and replace in the moistener base.
8. Replace the moistener brush in the holder (see step 3).
9. Replace the moistener brush assembly on top of the moistener base and secure with the plastic thumbscrew.
1. Tap the Settings (gear) icon in the global toolbar.
2. Tap Display Brightness in the Device & Network section of the screen.
3. Move the slider to adjust the brightness.
4. Tap the Back button or Home icon to exit the Settings screen.
1. Tap Envelope Printing on the Home screen.
2. Tap the Pieces button.
3. Tap Reset Counter to 0.
Note: Be certain that you want to delete the piece count information, as you cannot restore the deleted data.
When you install your franking machine, you are prompted to enter the time zone and a location code.
If you need to modify either of these values (for example, you have moved the scale to a new geographical location or added a new or different scale):
1. Tap the Settings (gear) icon in the global toolbar.
2. Tap Location & Time Zone.
3. Enter your new Location Code. See the list of location codes provided with your scale.
4. Enter the Time Zone.
5. Tap Apply.
When you move your scale to a new geographical location or add a new or different scale, you may need to modify the Location and Time Zone values you entered when you installed your machine.
Your franking machine creates a series of system logs that monitor a variety of operations on your device. Technical Support may ask you to upload one or more of these logs.
1. Tap the Settings (gear) icon in the global toolbar.
2. Scroll down to the Advanced Device Options section.
3. Tap System Log Upload to see a list of the available logs.
4. Tap on the check box in front of any log that you wish to deselect.
5. Tap the Upload Selected Logs button.
6. Once the upload completes, an upload message bar appears at the bottom of the screen.
7. Tap OK in the message bar.
8. Once the upload completes, a confirmation message is displayed.
9. Tap Got It to close the message.
10. Select another log to upload, or swipe down from the top of the screen and then tap on the Home icon to exit.
Issue
The screen is blank or black.
Cause
The franking machine is turned off or does not have power.
Resolution
If the postage franking machine is frozen on a black or blank screen, please leave the franking machine plugged in and powered on for an hour to see if the issue resolves.
If you need further assistance, please contact us on 01543 572 776.
Issue
The power light is flashing and the franking machine is not working.
Cause
The power button was held down too long when turning the franking machine on or off.
Resolution
You may be able to clear the error by restarting the franking machine.
1. Unplug the power cable.
2. Wait five (5) minutes. The screen should turn off after 10 seconds.
3. Plug the power cable back in, ensuring that it is plugged directly into a wall outlet.
4. Quickly tap and release the power button to turn the franking machine back on.
Tips:
– When turning the franking machine on, just tap the power button. Do not hold it down.
– When turning the franking machine off, hold the power button for only 5 seconds.
If you need further assistance, please contact us on 01543 572 776.
The toolbar is located at the top of every screen.
Use the toolbar to view and change settings and default values for your device, view online help and includes information for your network type and wireless signal strength.
1. Back – Return to the previous screen.
2. Home – Return to the Home screen from any screen.
3. Support – Search online support content and get information on how to perform tasks.
4. Network – View the current network type (wireless or Ethernet) and status and strength (for wireless connection). Allows you to turn wireless connection on or off. The icon here represents a wireless connection.
5. Profile – Lock your device when you have enabled the security PIN.
6. Settings – View or change your device and application settings. This includes adjusting the screen brightness, setting sound notification levels, and viewing wireless or Ethernet connection information.
The Home screen is the first screen you see after switching the device on or if you wake it from sleep mode. The Home screen provides the starting point for printing a Shipping label or printing postage.
Tap the Home icon in any screen to return to the Home screen.
Envelope Printing: Tap “Envelope Printing” to print general purpose envelopes, post cards and small parcels.
Use the Shipping History app on the Home screen to find a tracking number for a parcel.
1. Tap “Shipping History” in the app drawer at the bottom of the Home screen.
2. Find the parcel you want to track in the list.
3. Enter the tracking number in Royal Mail’s or ParcelForce’s website (https://www.royalmail.com/track-your-item) or (https://www.parcelforce.com/track-trace).
Watch this video to learn how to advance the date for franked mail.
Advance the date to print postage up to thirty days before you need to send it. To advance the date, read the instructions below:
1. Tap “Envelope Printing” on the Home screen.
2. Tap the date. The calendar appears.
3. Tap “Tomorrow” or another Date, depending on the date you wish to print.
4. When you see the future date highlighted on the calendar, tap “Apply”.
5. Place your envelope or envelopes on the feed deck. Depending on the model you have, feed the envelopes manually or tap Start to feed the envelopes.
Note: The date on the postage should match the date when your mail goes to the post office. Your device automatically advances the printed date on the device stamp (as well as its internally held date) when the device time reaches 5:00 PM. You cannot change this time.
If you get a bad quality test print pattern, clean your printhead nozzles to try to correct the problem.
1. Tap the “Settings icon” on the toolbar.
2. Scroll down to the Envelope Printer Settings section.
3. Tap the “Envelope Printer Maintenance” button.
4. Tap “Clean Printhead”.
5. Once the cleaning operation completes, the device prompts you to print another test pattern. If the new pattern still has broken or missing lines, you may need to replace the ink cartridge or printhead.
Issue
The message “You’re out of tracking numbers. Connect Now” appears when using Special Delivery or Signed For rates.
Cause
All the remaining barcodes have been printed.
Resolution
1. Tap Connect Now. Your device downloads and then installs more barcodes.
2. You can continue to print mail using Special Delivery or Signed For rates.
Issue
“Tape Transport error” appears and you cannot print tapes.
Cause
A tape / franking label is stuck in the device. Remove the stuck tape / franking label from the device if Tape Transport error appears.
Resolution
1. Remove the tapes / franking labels from the tape slot.
2. Turn the paper jam lever clockwise to drop the deck and remove the tape / franking label.
3. Turn the jam lever back to the locked position.
4. Replace the tapes / franking labels in the tape slot on top of the feeder. Make sure the printable side faces to the right (toward the touchscreen). Tap Tape to continue.
Issue
If an envelope jams in your device feeder, the message Problem with the Feeder appears.
Cause
This issue is usually caused by a jam in the feeder.
Resolution
1. Open the feeder cover.
2. Lift up on the jam release lever and move it to the left until it clicks into place.
3. Pull the envelope slightly to the left, then out the front.
4. Move the jam release lever back to its original position and close the feeder cover.
5. Load the mail stack properly on the feed deck.
6. Make sure the moistener setting lever is in the right position for your envelopes.
7. Tap “Start” to continue.