DM60 Common Errors Support
If your franking machine display screen is blank, then the franking machine may be in sleep mode, or it may not be receiving power.
To solve this problem please follow all the steps listed below.
1. The franking machine may be in sleep mode. Press any button to wake it up.
2. Ensure that the power cord is plugged into the franking machine and a working electrical outlet. Note: Ensure that the power cord is not plugged into a multi-plug adapter. If it is, try plugging the franking machine directly into a wall socket if possible.
3. Unplug the power cord, wait one minute, then plug it back in. The print carriage should move while powering up.
4. Wait one minute for the franking machine to fully power up. Note: Perform the remaining steps even if you cannot see anything on the screen.
5. If you have set a lock code on your franking machine, you will need to enter it now.
6. Press “Menu / Options” key.
7. Press “Review (up)” key once (the franking machine will be displaying “Change setup?”)
8. Press “Enter/Yes” twice.
9. The franking machine is now in the “Change Display Contrast” menu. Press “Review (up)” several times to increase the contrast.
Issue
The wrong town name is being printed in the circle on franked letters.
Cause
This may be due to the franking machine being moved and our records not being updated.
Resolution
If you have not updated your online account to notify us of your change of address, please click here to do so first.
If you have updated your account online to reflect your change of address and have allowed 10 working days, please follow the steps below to check for an updated town circle:
1. Ensure that your franking machine is connected via a Communication Device, PC Meter Connect, or via an analogue phone line, in order to communicate with the Data Centre.
2. Press the “Funds” key.
3. Press the “Review (down)” key until you reach Check Balance Available? Press “Enter/Yes”.
4. The franking machine will connect to the server. Once the Prepaid balance is shown, press “Enter/Yes”.
5. Press “No” when Refill Postage? shows.
6. If there is an update available, you will see the prompt Software Update required please wait. Press “Enter/Yes” and follow the prompts to download the update.
Issue
The Ink Latch on the franking machine has jammed or got stuck.
Cause
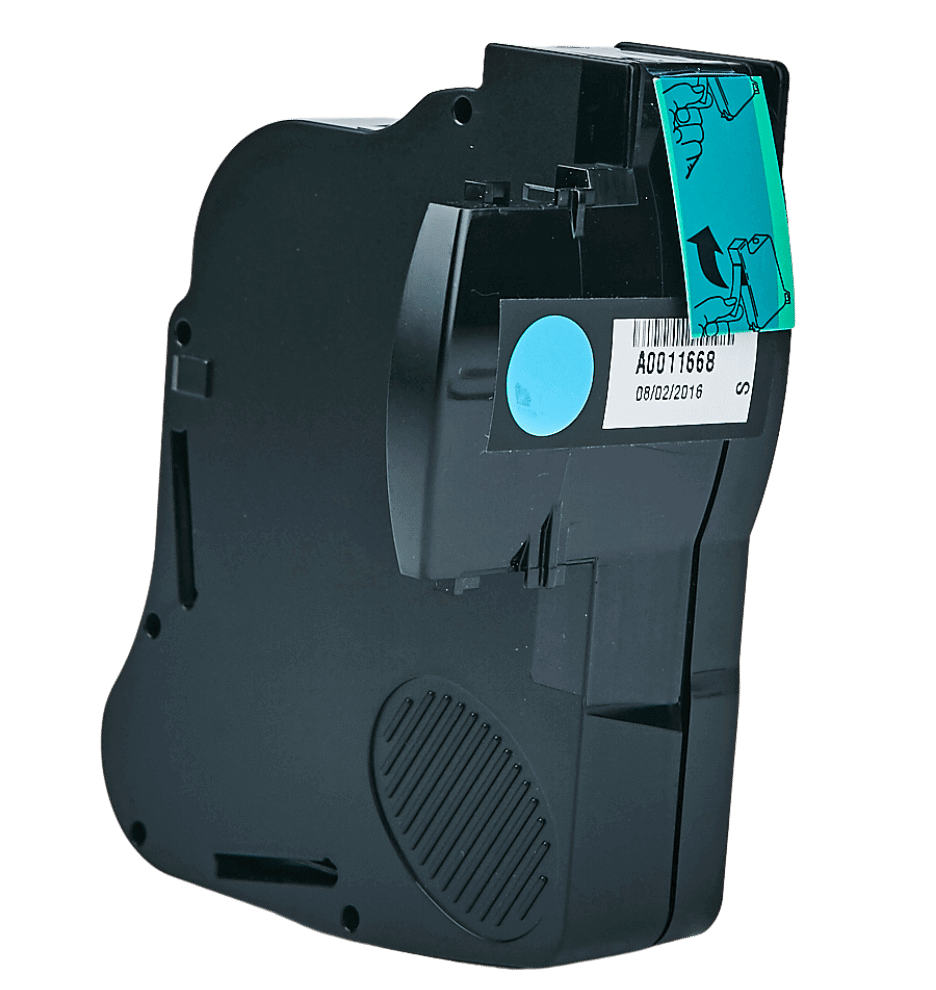
After replacing the ink cartridge, the Green latch with the Lock and Unlock symbol has become caught up or jammed.
Resolution
Solution 1
1. Please ensure that you are pressing the unlock symbol on the latch.
2. Push down on the unlock symbol firmly.
Solution 2
1. Push the Lock Symbol firmly and then try the Unlock symbol again.
Issue
Mail Exceeds Weight Limit or Capacity is displayed on your franking machine screen.
Cause
This error displays because the item being weighed is too heavy for the class selected.
Resolution
Refer to the Royal Mail rates guide to ensure that the item is within the guidelines set by Royal Mail. Download our Royal Mail 2021 Postage Rates wall poster here.
Issue
My franking machine changes the date at 5pm.
Cause
Royal Mail requirements.
Resolution
The date on your franking machine changes to the next day at 5pm every evening in order to meet Royal Mail requirements. You can still post your mail as usual. The exact date and time is included within the 2D bar code on the frank.
If your franking machine is damaged due to flood, fire or any natural disaster please contact your office contents insurance provider to make a claim.
Issue
Some Royal Mail services are not showing on my franking machine.
Cause
Certain Royal Mail services do not appear on your franking machine for certain locations
Resolution
Royal Mail does not offer all of its services to all countries. For example, while International standard is available to a wide range of countries, International tracked / tracked and signed is only available to countries where the delivering part offers these services.
Issue
Your franking machine keyboard sticks or does not respond.
Cause
The keyboard can become faulty due to normal wear and tear.
Resolution
1. Remove the power lead so that the screen goes blank.
2. Buttons that are not stuck down make a gentle click when pressing. If any key seems to be stuck under the plastic cover of the franking machine, use the blunt end of a pen to gently push the key affected down slightly and see if you can centralise it back to its original position. You may need to test all the keyboard keys if it is not obvious which key is stuck.
3. Replace the power lead.
4. Test the keyboard by pressing any of the keys when the franking machine returns to the home screen.
Issue
The franking machine screen displays the “Manufacturing Mode” message.
Cause
This issue is caused by a software fault.
Resolution
Restart your franking machine to resolve this issue:
1. Turn the franking machine off.
2. Wait 30 seconds.
3. Turn the franking machine back on and wait for it to initialise.
Before you begin, ensure that the Home screen is visible. The Home screen is the default screen that appears after the franking machine has been switched on or has been woken from sleep mode. In this example we are going to process a First Class letter.
1. Place the mail piece on the scale. The franking machine calculates the weight of the item.
2. Press the Class button.
3. The screen will display Royal Mail. Press the “Enter/Yes” button.
4. The screen will display 1st Class. Press the “Enter/Yes” button. (You may use the Review Down button to scroll down to select a different class, if required).
5. The screen will display Letter. Press the “Enter/Yes” button.
6. You are now returned to the Home screen. Feed the envelope or tape sheet into the franking machine to print the frank.
The serial number is the identification number registered with the postal carrier for the postage meter license.
This number shows on the identification tag on a white sticker located at back of the franking machine. The Product Code Number (PCN) is the franking machine type. The serial number (Meter #) is a 7-digit number, beginning 3… or 6… or 2… depending on the model.
The incidia is printed on franked mail in the top right-hand corner, under/beside the postage amount. It is usually the same as the Meter #, but with PB in place of the first digit.
If you need to move your franking machine, whether its across the room or to a new facility, a few precautions need to be taken. Follow these steps to move it safely.
1. Remove the ink cartridge:
a. Press the “Menu / Options” key.
b. Press “Review (down)” until the message “Use ink functions?” is displayed.
c. Press “Enter/Yes”.
d. Press “Review (down)” until the message “Replace ink cartridge?” is displayed.
e. Press “Enter/Yes”.
f. Open the top cover.
g. Press the top of the ink cartridge latch located on the green unlock icon.
h. Remove the ink cartridge and place it in a zip-top bag, as it may leak in transport.
2. Unplug the power cord and close the cover.
3. Unplug the scale from the back of the franking machine and remove it from the top of the franking machine.
Note: When you move the franking machine, make sure that it stays level or ink may leak and damage the franking machine.
4. Reinstall the ink cartridge.
Note: This must be done before applying power to the franking machine.
5. Plug the scale into the back of the meter and place it on the top of the franking machine.
6. Plug the power cord into the franking machine and power outlet.
Royal Mail Signed For has replaced Recorded Delivery. This service can only be used for mail sent within the UK.
A signature is still required from the receiver, just as Recorded Delivery used to.
1. From the Home screen (franking machine displays today’s date) press the “Class” key.
2. The franking machine will display “Select Carrier”.
3. Press the “Review (Down)” key until “Royal Mail” is displayed.
4. Press the “Enter/Yes” key.
5. Scroll through the available options until “RM Signed For” is displayed. Press “Enter/Yes”.
6. Select the desired Class.
7. Select the desired mail type – for example: Letter, Large Letter, Small or Medium Parcel, etc.
Once you have selected the desired options, the franking machine will return to the home screen ready to print your envelope or label.
Remember that Royal Mail Signed For items require a barcode label to be applied so the Royal Mail can track your item. Take your Signed For items to your local Royal Mail branch or Post Office. Alternatively, obtain barcode labels from the Royal Mail.
When you send mail to Southern Ireland you have to use the international classes available on the franking machine. The franking machine menu uses Republic of Ireland for Southern Ireland.
1. Ensure the home screen is displayed. The home screen shows the date and the current class of mail selected.
2. Place the mail piece on the scale.
3. Press the “Class” key.
4. When Select Carrier: 1 Royal Mail is displayed press “Enter/Yes”.
5. Use the “Review Down” key until you see the desired international class you’d like to use (Int Standard / Int Economy / Int Tracked / Int Trk&Sign / Int Signed. Confirm your choice with the “Enter/Yes” key.
6. Use the “Review Down” key to select the size of the item (Letter / Large Letter / Sm Parcel / Print Paper).
7. Enter country is displayed. Now press the number seven key three times.
8. If necessary, use the “Review Down” key until Rep. Ireland is displayed. Press the “Enter/Yes” key.
9. You are then returned to the home screen. You can now insert your mail piece or tape sheet into the franking machine.
Use Royal Mail’s International service to mail items outside the UK.
1. Select “Class” from the Home screen (franking machine displays today’s date).
2. Select “Royal Mail”.
3. Press “Page Down” to scroll through the options.
4. Select the required International service.
5. Select the required size.
6. You return to the Home screen automatically once you select all the desired options.
7. Feed the envelope into the franking machine to print the International service impression.
Important: Remember that Royal Mail International Standard items require:
– an AIR MAIL sticker OR
– write ‘BY AIR MAIL — PAR AVION’ in the top left corner on the front of the item.
The exception is items posted in Northern Ireland that are bound for the Republic of Ireland.
Watch this video to learn how to process a surcharge payment.
A Surcharge Payment allows you to print a custom postage amount on your franking machine. You can enter any value from £0.00 up to £999.99.
1. From the Home screen (franking machine displays today’s date) press the “Class” key.
2. The franking machine will display Select Carrier.
3. Press the “Review (Down”) key until Surch Pymt is displayed.
4. Press “Enter” twice.
5. Key in the desired amount of postage in pounds and pence.
6. Press “Enter” twice.
7. The franking machine will return to the Home screen, ready to print mail.
To exit Surcharge Payment, simply select a Class and mail type:
1. From the Home screen (franking machine displays today’s date) press the “Class” key.
2. The franking machine will display Select Carrier.
3. Use the “Review Up/Down” arrow keys to scroll through the list of carriers. Press “Enter/Yes” to select a carrier, e.g. Royal Mail.
4. The franking machine will display Select Class.
5. Use the “Review Up/Down” arrow keys to scroll through the list of options. Select by pressing “Enter/Yes”.
6. The franking machine will display a list of mail types (e.g. Letter, Large Letter, etc).
7. Use the “Review Up/Down” arrow keys to scroll through the list of options. Select by pressing “Enter/Yes”.
8. The franking machine will return to the Home screen, ready to print mail.
Watch this video to learn how to frank a letter or parcel.
1. From the home screen, press the “Class” button.
2. Select the option “Royal Mail” by pressing the yes/enter button.
3. Use the review buttons to select the service that you require.
4. Now you need to select your size, do this by measuring your item using your Mailcoms PIP ruler.
5. Once you have selected your size press yes/enter.
6. The machine will now display a price for the item selected.
7. You know need to weigh your item, simply place this on the scale and the machine will adjust the price according to the weight.
8. Insert your item into the front to frank your item.
Please Note: If your item is to large to insert in the machine, use your Mailcoms franking labels and affix to the item.
Watch this video to learn how to reboot the franking machine.
To reboot the franking machine, please follow the below instructions:
1. Turn the machine around so you can see the back.
2. Remove the main power cable from the back of the machine.
3. Wait 10 seconds, the reinsert the power cable to reboot the machine.
Watch this video to learn how to advance the date for franked mail.
To advance the date for franked mail, please follow the below instructions:
1. From the home screen, press Menu/options.
2. Page down (Review) until you see “Change date settings?”, Press yes/enter.
3. The machine will now display “Change printed date?”, press yes/enter.
4. Use the review arrows to select the required date for your mail. Press yes/enter on the date needed.
5. The machine will inform the date has been set and will return to the home screen.
Please note: If you use this function, always check before franking any other items, that you have the correct date set, to avoid any charges.
Watch this video to learn how to check for updates / update the postage rates.
To check for updates / update the postage rates, please follow the below instructions:
1. From the home screen, press Menu/options.
2. Review down until you see an option that says, “Connect to Pitney Bowes?”, press yes/enter.
3. The machine will now connect and take any pending updates.
4. Once done follow the steps on screen to complete the update process.